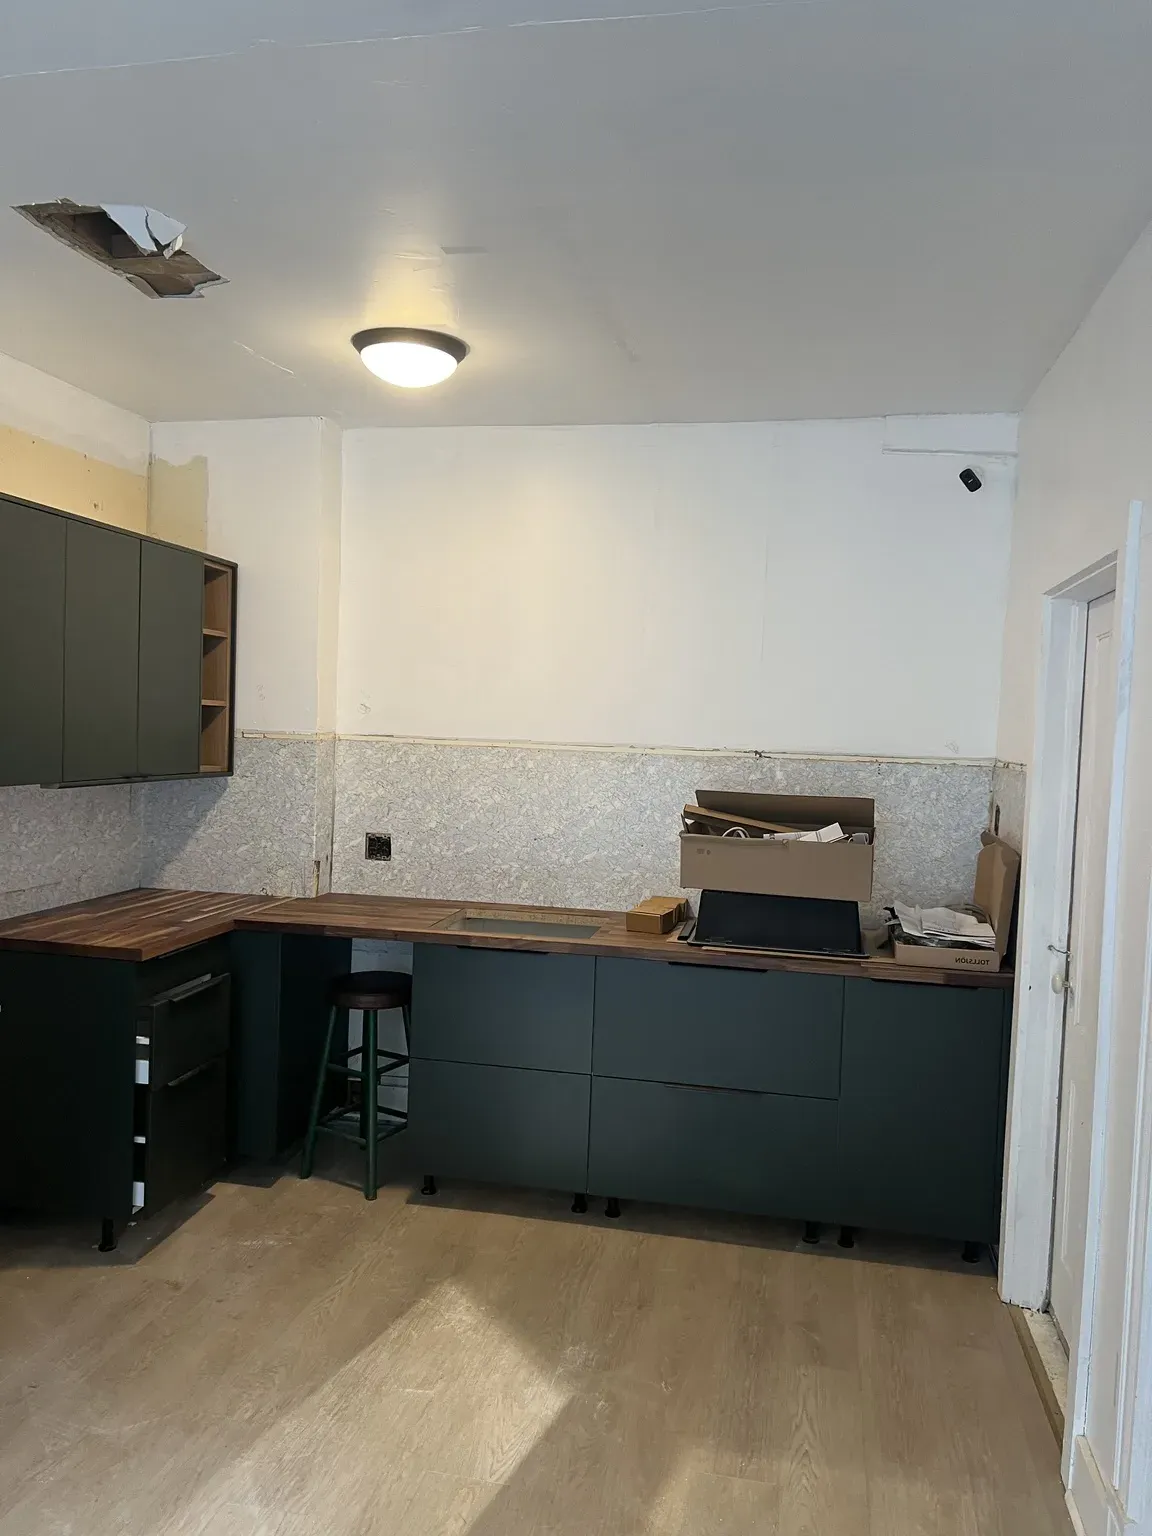
Key takeaways
- Every suspension rail fastener on plaster goes through the plaster and lath into a stud; plaster and lath alone never carry a cabinet.
- A strong magnet finds the lath nails, which line up on studs, and small probe holes behind the cabinet footprint confirm what the magnet suggests.
- Pre-drill through the plaster with a carbide bit in drill-only mode before driving any screw, or the plaster cracks and the keys break.
- Expect plaster to add one to three hours per wall of upper cabinets; a failing wall that needs a plywood backer adds half a day and a carpenter.
- The rail's biggest advantage on old walls is that the load is shared across many fasteners and each cabinet can be adjusted after hanging.
Cost
Adds 10–15% to installation labor
Time
Adds about half a day
Difficulty
Hire a pro
Tools
Magnet stud finder, structural screws, shims, masonry and wood bits
On this page
- Why plaster and lath is different from drywall
- Finding studs you can trust
- Why the SEKTION suspension rail is an advantage on old walls
- Mounting the rail on plaster, step by step
- Wall conditions we see, and what they add
- Bowed walls, out-of-square corners and scribing
- Surprises inside old walls: wiring, pipes and plywood backers
- What plaster walls do to cost and schedule
- Plaster walls around New England
- Before install day
You hang IKEA wall cabinets on plaster and lath the same way you hang them on drywall, on the steel SEKTION suspension rail, with three changes: every rail fastener goes through the plaster and lath and into a stud, you pre-drill through the plaster before you drive anything, and you plan for a wall that is neither flat nor plumb. Do those three things and plaster is a perfectly good wall to hang a kitchen on. Skip them and you get cracked plaster, stripped screws, or a rail held up by half an inch of hundred-year-old gypsum and horsehair.
Most of the houses we work in across Massachusetts, Connecticut and Rhode Island were built between 1850 and 1940, and most of them have plaster walls in the kitchen. This is how we handle them.
Why plaster and lath is different from drywall
Drywall is a factory sheet of consistent thickness, usually 1/2 inch, screwed to studs you can find with an inexpensive electronic stud finder. Plaster and lath is a site-built wall. Thin wood strips (the lath, roughly 1/4 inch thick and 1-1/2 inches wide, with a gap between each) were nailed horizontally across the studs, then a scratch coat, a brown coat and a finish coat of plaster were troweled on by hand. The wet plaster squeezed through the gaps and hardened into "keys" that lock the wall to the lath.
That construction creates five problems for a cabinet installer:
- Thickness varies. A hand-floated wall can be 5/8 inch at one end and over an inch at the other. Add a 1930s skim coat, or a sheet of 3/8 inch drywall that someone glued over it in 1985, and the total can pass 1-1/2 inches. Screw length has to account for the thickest spot, not the average.
- Keys crumble. After a century of doors slamming and houses settling, many keys have broken. The plaster is held on by the surviving keys, friction and paint. Vibration from drilling can break more, and a hammer-drill setting will break a lot.
- Lath moves. A screw that stops in lath will hold a cabinet for a while. Lath flexes every time a door closes, the screw works loose, and one day the rail is hanging on the screws that did reach studs while the plaster behind the others is cracked.
- Studs hide. Electronic stud finders read the lath and plaster as one dense mass and give false positives everywhere. Pre-1940 framing is also less regular than modern 16 inch centers. We see 12 to 24 inch spacing on the same wall, extra studs beside old window openings, and corners with no nailing surface at all.
- Old walls hide things. Knob-and-tube wiring, capped gas pipes from lighting fixtures and abandoned chimney chases all turn up at cabinet height. More on that below.
None of this makes plaster a bad wall. Properly fastened into the framing, it is at least as solid as drywall. It just does not forgive guessing.
Finding studs you can trust
We use two methods together, because each one on its own lies occasionally.
The magnet. A strong rare-earth magnet, the kind sold as a stud finder for plaster, finds the nails that hold the lath to the studs. Run it slowly along the wall at the height where the suspension rail will sit. Every time it grabs, mark the spot with painter's tape. Lath nails cluster in vertical lines, and each line is a stud. On a good wall you will see a column of tape marks roughly every 16 inches. On an old wall you will see the truth, which is often less tidy.
The probe hole. Once the magnet suggests a stud, we confirm it with a 1/8 inch hole drilled at the rail line, inside the footprint the cabinet will cover. Drill through the plaster until the bit reaches wood. If it passes through 1/4 inch of lath and then into air, there is no stud there; move 3/4 inch to the side and try again. When the bit stays in wood past the lath, you have found the stud. Two more probes find its edges so the screw goes into the center rather than splitting the edge. Because the holes sit behind the cabinet, nothing needs patching.
For a single 30 inch wall cabinet, we want fasteners in at least two studs. Across a full run, we fasten at every stud the rail crosses, which is the whole point of the next section.
Why the SEKTION suspension rail is an advantage on old walls
SEKTION wall cabinets do not screw directly to the wall. A steel rail is fastened horizontally along the wall, cabinets hook onto it with adjustable brackets inside each box, and the cabinets are then leveled and pulled tight to the wall with those brackets. Our suspension rail installation guide covers the basics; here is why it is the right system for plaster.
- The load is shared. A 10 foot run of cabinets on a rail fastened at every stud is carried by seven or eight screws working together, not by four screws in one cabinet's back panel. If one fastener lands in a weak spot, the rail spreads the load to its neighbors.
- The rail bridges bad spots. Where plaster is soft or missing for a few inches, the rail spans it. Where a stud is missing behind one cabinet, that cabinet still hangs on a rail fastened to studs on either side.
- Cabinets adjust after hanging. The brackets move each cabinet up, down, in and out. On a wall that leans half an inch over the height of a cabinet, that adjustment is the difference between doors that line up and doors that do not.
- Fasteners can go anywhere along the rail. If a factory slot does not land on a stud, we drill a new hole in the rail. Old framing spacing stops mattering.
Choosing fasteners
- Structural screws into studs are the primary, and usually the only, fastener. We use 1/4 inch structural screws or heavy cabinet screws with washer heads, long enough to pass through the rail, the full thickness of plaster and lath, and at least 1-1/2 inches into the stud. On most plaster walls that means 3 to 3-1/2 inch screws. Drywall screws are brittle and are not acceptable here.
- Toggle anchors are a supplement, never the support. Where studs sit more than 20 inches apart and a cabinet would otherwise hang between them, a heavy-duty toggle through the plaster and lath adds some resistance to the rail pulling away from the wall. It does not carry weight. If a toggle is the only thing holding a section of rail, that section is not installed.
- Nothing goes into plaster alone. Plastic expansion anchors, self-drilling drywall anchors and the small screws in the IKEA hardware bag do not belong in a plaster wall. They hold until the first time someone leans on the counter.
- Masonry is different. Where a chimney chase or a brick party wall sits behind the plaster, sleeve anchors into sound brick are an acceptable fastener. Brick is not the problem; plaster is.
Mounting the rail on plaster, step by step
- Set the layout line. Find the high point of the floor with a laser or a long level and mark the finished height of the base cabinets from there, 34-1/2 inches with legs. Add the countertop thickness, then the gap to the underside of the wall cabinets, usually 18 inches. From that bottom line, measure up the height of your wall cabinet to find where the rail goes, following IKEA's instructions for your cabinet height. Strike the rail line with a laser or a chalk line, not by measuring up from the floor in several places, because the floor is not level.
- Find and mark every stud along the rail line using the magnet and probe holes described above. Mark the stud centers on painter's tape.
- Cut the rail to length and hold it on the line. Transfer the stud centers onto the rail. Where a stud does not meet a factory slot, drill a new 1/4 inch hole in the rail.
- Mark the fastener points on the wall through the rail, then set the rail down.
- Pre-drill the plaster. Use a carbide or masonry bit a little larger than the screw shank, with the drill in drill-only mode. Never use the hammer setting on plaster. Go slowly through the plaster, then switch to a wood bit to continue through the lath and pilot into the stud. A piece of painter's tape over the spot helps keep the finish coat from chipping.
- Check the wall for flatness before fastening. Hold a 6 foot level or straightedge along the rail line. Where the wall dips, place steel or hardwood shims behind the rail at each fastener point so the rail sits straight rather than following the wall's belly. Where the wall bows outward in the middle of the run, the shims go at the ends.
- Drive the screws snug, not tight. Structural screws driven hard into old plaster crush it, and the rail ends up bearing on powder. Snug is enough; the load on these screws is shear, not clamping.
- Check level along the full length with the long level and the laser, then re-check each fastener. A rail that is 1/8 inch off over 10 feet shows up as a visible step between the first door and the last.
- Hang the cabinets, screw adjacent boxes to each other, then use the brackets to pull each one plumb and tight. On a wall that leans, you will pull the top in with the bracket and, if needed, set a thin shim behind the bottom of the cabinet so the box is not racked.
Wall conditions we see, and what they add
| Wall condition | What we do | Time added |
|---|---|---|
| Sound plaster, regular studs | Standard rail install with probe holes and pre-drilling | 30 to 60 minutes per wall |
| Plaster with a drywall or skim layer on top | Measure total thickness at several points, use longer screws | About 30 minutes |
| Loose or bulging plaster at the rail line | Re-secure with plaster washers and screws into the lath, or cut out and patch the section behind the cabinets | 1 to 2 hours |
| Crumbling plaster with no keys left | Remove plaster in the cabinet footprint and install a 3/4 inch plywood backer on the studs | Half a day, usually with a carpenter |
| Wall out of plumb more than 1/2 inch over the cabinet height | Shim the rail, adjust brackets, scribe fillers and end panels | 1 to 2 hours per wall |
| Stud spacing over 20 inches or irregular | Fasten at every stud, drill new rail holes, add a toggle as a supplement between studs | About 30 minutes |
| Corner with no nailing surface | Add blocking or a small backer in the corner | 1 to 2 hours |
| Brick chimney chase behind the plaster | Sleeve anchors into sound brick after probing | About an hour |
| Knob-and-tube or a gas pipe found at the rail line | Stop, bring in the licensed electrician or plumber, adjust the layout if needed | Half a day to several days |
Times are for one wall of upper cabinets and assume the rest of the installation proceeds normally. For how the whole job is priced, see our IKEA kitchen installation cost breakdown.
Bowed walls, out-of-square corners and scribing
The rail solves the up-and-down and in-and-out problems. What it cannot solve is a wall that is not straight along its length, or two walls that do not meet at 90 degrees. Old plaster is rarely straight, and old corners are rarely square.
Check the corner with a framing square and a 24 inch straightedge. If the corner is 1/2 inch open over 24 inches, a run of cabinets set tight to one wall will drift away from the other by more than an inch over 6 feet. The fix is planning, not force. We start the layout from the corner, hold the run parallel to the wall it sits on, and take up the difference with a filler piece at the end of the run. SEKTION fillers come in the door finishes, are cut to width on site, and are scribed to follow the wall so the joint disappears. The same applies to cover panels on exposed cabinet ends where the wall bellies behind them.
A bowed wall, with a belly in the middle of the run, shows up as a cabinet back that touches the wall at the bulge and gaps at the ends. Because the rail is straight, the cabinets are straight; the gap is between cabinet and wall. Small gaps get a scribe strip in a matching finish. On a badly bowed wall we hold the whole run off the wall by a uniform amount and use a wider scribed filler at the ends, which reads as intentional rather than crooked.
The floor gets the same treatment. Base cabinets on adjustable legs handle a floor that is an inch out across a run, which is common in these houses. Our guide on how to level IKEA cabinets on an uneven floor covers that side of the job, and the toe kick and filler guide shows how the fillers finish.
Surprises inside old walls: wiring, pipes and plywood backers
The rail line, roughly 6 to 7 feet off the floor, crosses the same height where electricians ran horizontal wiring in the early twentieth century, and where gas lines for wall lighting were stubbed off before electricity arrived.
- Knob-and-tube wiring is still live in many pre-1950 houses in this region. Before drilling any probe hole, we hold a non-contact voltage tester against the wall. Any reading stops the work until a licensed electrician has looked. We do not do electrical work, and neither should a cabinet installer. Our IKEA kitchen electrical requirements guide explains what the electrician needs to handle before the cabinets go up.
- Capped gas pipes from old wall sconces sit inside the walls of Victorian-era houses. Look in the basement for black iron stubs heading up into kitchen walls. Where we suspect one, we probe wider before committing a screw.
- Plumbing vents and old galvanized supply lines run in the wall behind and beside the sink. Probe holes tell us where they are before the screws do.
- Chimney chases and brick party walls hide behind plaster with no lath at all. The magnet finds nothing, the probe hits brick, and the fastening changes to masonry anchors.
When a plywood backer makes sense: when the plaster over a run of several feet has no keys left and moves when pressed, when studs are so irregular that a cabinet would hang between them, when a corner has no framing to fasten to, or when a rubble-filled chase offers no sound brick. In those cases a carpenter removes the plaster within the cabinet footprint and screws 3/4 inch plywood to the studs. The rail then fastens anywhere along the plywood. The backer adds thickness, which changes filler and panel dimensions, so it needs to be decided before the IKEA order is finalized, not on install day. Our guide to IKEA kitchens in old houses covers the other decisions that belong in that conversation.
What plaster walls do to cost and schedule
On a sound plaster wall, expect the rail to take one to three hours longer than the same wall in drywall, spread across the probing, pre-drilling and shimming. On a medium kitchen with two walls of uppers, that is roughly half a day added to a three to four day installation. A wall that needs a plywood backer adds half a day plus a carpenter's time, and plaster repair behind the cabinets is a separate line.
In price terms, plaster pushes a job toward the upper part of the $2,500 to $4,500 range we quote for a standard 10x10 kitchen, and a backer or plaster repair is itemized on top. We name plaster explicitly in the quote, because walls we cannot see behind are the most common reason a fixed price changes, and we would rather say so in advance. Our IKEA kitchen installation cost calculator gives a first estimate, and our installation timeline guide shows where the extra half day fits.
Plaster walls around New England
Plaster is the default wall in the neighborhoods where we work most, and each housing type has its habits.
- Somerville, Cambridge and Dorchester triple-deckers (mostly 1890 to 1925) have plaster over sawn lath on balloon-framed walls, kitchens at the back of each floor, and second- and third-floor walk-ups. Many have a skim coat from a later renovation. Studs are usually close to 16 inches but wander near the back stair. See our Somerville and Cambridge pages, and the multi-family homes guide for the walk-up logistics.
- Providence Victorians on the East Side, Federal Hill and in Elmwood have tall ceilings, thick three-coat plaster and chimney chases that run through kitchen walls. Plaster on brick shows up on party walls. Our Providence page covers the city.
- Hartford, West Hartford and New Haven colonials and 1920s to 1930s houses often have rock lath, perforated gypsum boards that took the place of wood strips late in the plaster era. It behaves more like drywall but is thicker and harder, and the magnet still finds the nails. See Hartford and New Haven.
- Worcester three-deckers and the mill housing of Fall River, Pawtucket and Woonsocket follow the triple-decker pattern, with the added feature of walls that lean toward the street after a century of settling. Our Worcester page has more.
If your house is a Cape on the South Shore or on Cape Cod itself, our guide to IKEA kitchens for Cape Cod homes covers the wall types you are likely to find there.
Before install day
If your kitchen has plaster walls, tell us when you send the plan, and include a photo of any cracks, bulges or patched areas at cabinet height. We review every IKEA plan for free before quoting, and on an old house that review is where fillers, backers and rail heights get decided. Request a free estimate for IKEA cabinet assembly and installation anywhere in Massachusetts, Connecticut or Rhode Island, and we will tell you what your walls are likely to need before a single box arrives.
Frequently asked questions
About the authors
This guide was written and reviewed by the Hearthstone Kitchens installation team, who have installed 600+ IKEA kitchens in Massachusetts, Connecticut and Rhode Island over 7+ years. Prices reflect what we see on real quotes in 2026 and are updated when the market moves. We are an independent installer and are not affiliated with IKEA.
Ready to talk about ikea cabinet assembly?
Upload your IKEA plan or a few photos. We will check it for missing pieces and send an itemized estimate within 3 hours, free and with no obligation.